How to customize tabs in Salesforce
Today we will be covering how to customize your Tabs in Salesforce by rearranging or adding or removing tabs. To rearrange tabs, take the following steps:
- Click on the pencil in the upper right-hand corner.
- Click and drag the three lines next to the tab you want to move up or down.
- Click Save.
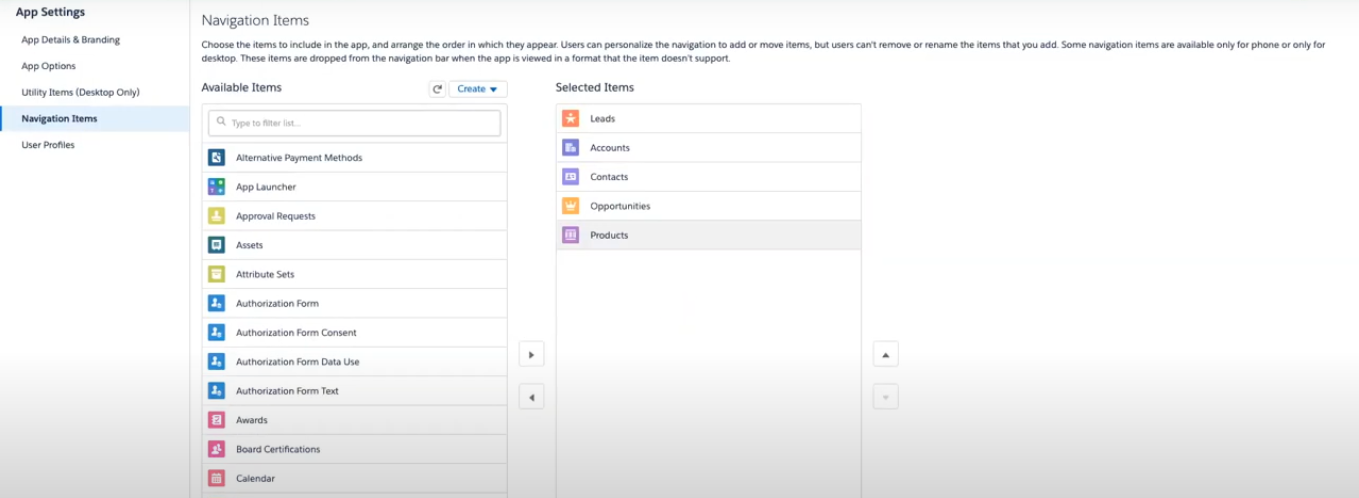
Adding and removing tabs is done in Setup, and can be done by taking the following steps:
- In Setup, navigate to App Manager.
- Edit the corresponding app.
- Click on “Navigation Items.”
- Add/Remove Objects from the “Selected Items Section.”
- Click Save.
Note that removing the Objects from the App Manager does not automatically remove tabs from the navigation bar. Click on the pencil to remove the apps now that they have been removed from the App Manager.

For more educational videos be sure to subscribe to our Youtube channel. or subscribe to our blog to receive weekly updates on the Salesforce topics you want to hear about. If you still need assistance with your Salesforce org, feel free to reach out to us. We can provide a free consultation or discuss our Salesforce implementation and consultation services.

Spencer Kunze
Salesforce App Builder
Spencer is a brilliant app builder who had a front-row seat to the family small business so whenever a company can use Salesforce to make their lives easier, Spencer personally knows just how big an impact that can have.
About Roycon
We’re an Austin-based Salesforce Consulting Partner, with a passion and belief that the Salesforce platform’s capabilities can help businesses run more efficiently and effectively. Whether you are just getting started with Salesforce or looking to realize its full potential, Roycon specializes in Salesforce Implementations, Salesforce Ongoing Support, and Salesforce Integrations, and Development. We’re the certified partner to guide the way to increase Salesforce Adoption, make strategic decisions, and build your Salesforce Roadmap for success.